SAP Configuration (Secure Network Connection)
Liquid UI Server supports advanced authentication with Secure Network Communications (SNC) to fulfill even the most complex customer requirements of SAP ERP. SNC is a secure network communication channel between the client and the SAP Server. It strengthens the security with additional authentication functions provided by the Liquid UI, which are not directly available with the SAP systems. You can use this domain name for multiple logins that can be executed by using the Liquid UI Server through software change.
In this article, we’ll demonstrate the SAP Configuration (Secure Network Connection) process through the following steps.
-
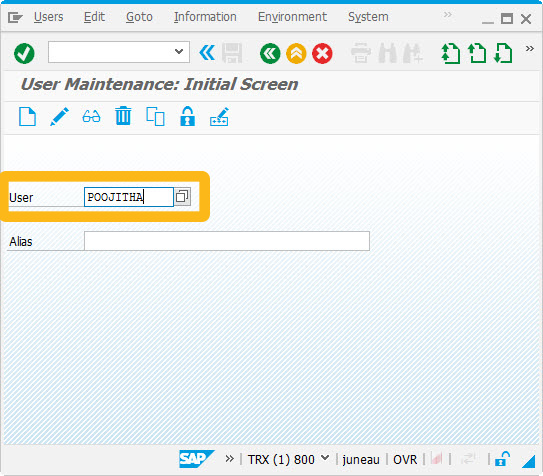
To Configure SAP GUI, navigate to SU01 transaction and enter the username.

-
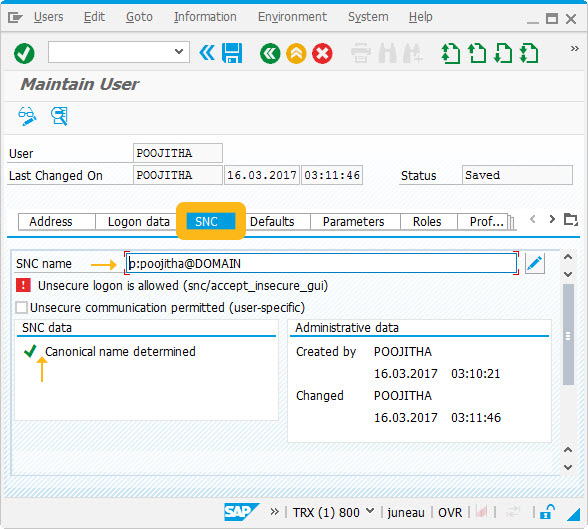
Click on the Display icon on the toolbar, and then you will be navigated to the below screen: Add Domain under the SNC tab, and click Save button. Use this domain name for Single Sign On.


Note: Use this domain name for both method 1 and method 2 while connecting to the SAP server.
Liquid UI supports the following methods for establishing a secure connection using SSO:
SSO Method 1: Windows Domain Credentials
As mentioned above, Secure Network Communication (SNC) strengthens security by using additional authentication functions provided by the Liquid UI, that are not directly available with the SAP systems. You need to map the SAP login username with the Windows user name (SNC name) to connect through SSO.
As we are using the Kerberos authentication, the system verifies the identity of the Liquid UI server and Liquid UI client and thereby offering minimum protection levels to your SAP ERP system. To make use of this secured authentication, configure gsskrb5.dll and gssntlm.dll to the Liquid UI server folder.

Note: This method 1 is only valid for SAP Server on Windows machines.
Procedure:
-
Map SAP login username with Windows user name (SNC name)
-
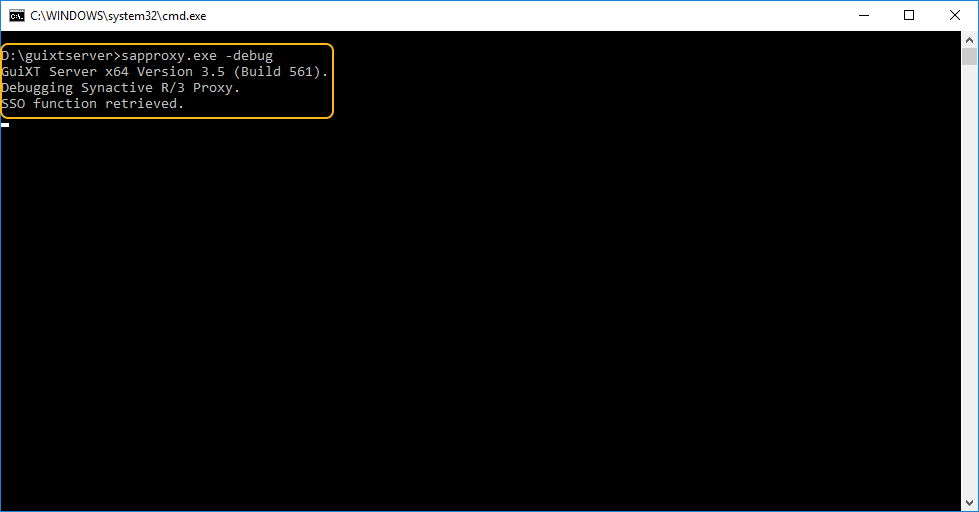
Confirm that the SAP SSO feature is enabled by running the sapproxy.exe, as shown in the image below.

-
Configure sapproxy.ini with domain and SNC name
-
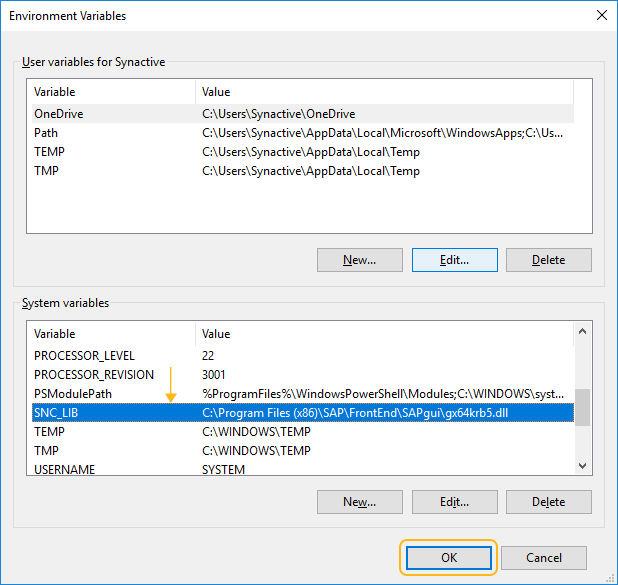
Make sure that Kerberos library files are added to the Environment variables. Follow the path: Control Panel → System and Security → System → Advanced system settings → Advanced tab → Environment Variables.

-
Finally, connect your Liquid UI Client to the Liquid UI Server, enter “domain\username”, and enter your domain password (Windows login credentials).


